
Puff Pastry Cornucopias (Festive Thanksgiving Table)
A puff pastry cornucopia is the ultimate edible centerpiece for your Thanksgiving table—a golden, flaky “horn of plenty” that you can fill with everything from cheeses and fruits to desserts and savory bites. This showstopping centerpiece looks like it took hours of professional pastry work, but it comes together easily using store-bought puff pastry and a simple foil mold .
The horn of plenty has long been a symbol of abundance and harvest, making it a perfect fit for Thanksgiving celebrations. Once baked, you can place the cornucopia on a large board and arrange the filling so it appears to be spilling out onto the table—a stunning way to present an appetizer spread, dessert bar, or even a charcuterie display .
Recipe Summary
Prep Time: 25 mins
Cook Time: 20-25 mins
Total Time: 45-50 mins
Servings: 6-8 (makes 1 large cornucopia)
Difficulty: Easy
Ingredients
- For the cornucopia:
- 1 sheet puff pastry (about 320g), thawed overnight in the fridge
- 1 egg + 1 tablespoon water (for egg wash)
- Heavy-duty aluminum foil (for the mold)
- Optional filling ideas:
- Grapes (red and green)
- Mini cheese wheels or cheese cubes
- Sliced apples and pears (toss in lemon juice to prevent browning)
- Assorted cookies or chocolates
- Dried cranberries and nuts
- Charcuterie like salami or prosciutto
How to Make a Puff Pastry Cornucopia
Follow these simple steps for a stunning Thanksgiving centerpiece.
- Preheat your oven to 400°F (200°C) and line a baking sheet with parchment paper .
- Create the foil mold. Tear off several sheets of heavy-duty aluminum foil and scrunch them into a cone shape, about 10-12 inches long. Bend the pointed end to create the classic curved cornucopia shape . Make it sturdy enough to hold its shape during baking. For a simpler approach, you can wrap sugar ice cream cones in foil to create smaller individual cornucopias .
- Cut the pastry into strips. On a lightly floured surface, gently roll the thawed puff pastry into a rectangle. Using a sharp knife or pizza cutter, cut the pastry into 1-inch-wide strips .
- Wrap the pastry around the mold. Starting at the pointed tip of the foil cone, wrap a pastry strip around it, slightly overlapping the edges as you go. When one strip runs out, brush the end with a little egg wash and press the next strip onto it to seal. Continue wrapping until the entire foil cone is covered .
- Decorate (optional). Use any leftover pastry scraps to cut out small leaf shapes. Brush them with egg wash and attach them near the opening of the cornucopia .
- Apply egg wash. Brush the entire pastry surface with the beaten egg mixture. This gives the cornucopia a beautiful golden shine. Sprinkle with sanding sugar for a sweet version or sesame seeds for a savory one .
- Chill before baking. Place the wrapped mold on the prepared baking sheet and refrigerate for 15 minutes. This firms up the butter and helps prevent shrinkage .
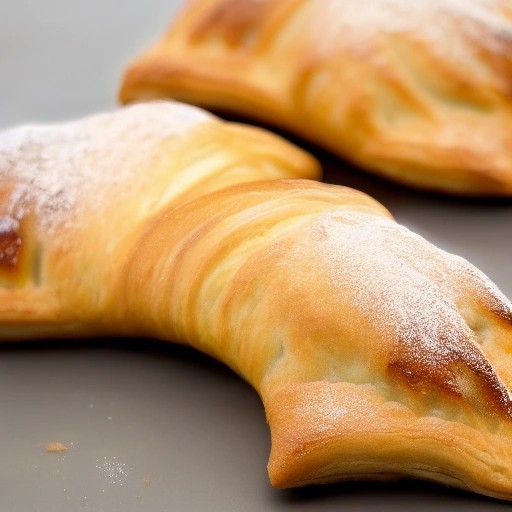
- Bake for 20-25 minutes, or until the pastry is puffed and deep golden brown . If it’s browning too quickly, cover loosely with foil during the last few minutes .
- Cool and remove the foil. Let the cornucopia cool completely on the baking sheet. Once cooled, carefully slide the foil mold out from inside the pastry .
- Fill and arrange. Place the cornucopia on a large serving board and fill it with your chosen ingredients. Arrange the remaining items around it so they look like they’re spilling out onto the table .
5 Tips for a Perfect Cornucopia
Use a sturdy foil mold. The foil mold needs to hold its shape during baking. Use several layers of heavy-duty foil and reinforce it if needed. Some bakers use an oven-safe bowl inside the cone for extra support .
Seal the pastry well. Overlap each strip of pastry and brush with egg wash between strips to create a strong seal. This prevents the pastry from separating during baking .
Keep the pastry cold. Puff pastry must stay cold for the butter to create those beautiful flaky layers. If it warms up while you’re wrapping, pop it back in the fridge for 10 minutes .
Trim the top neatly. When you reach the wide opening of the horn, trim any excess pastry so the edge is neat and even. Don’t tuck extra pastry into the cone—it will make it difficult to remove the foil after baking .
Make ahead. You can bake the cornucopia a day in advance and store it in an airtight container at room temperature. Fill it just before serving to keep everything fresh and crisp .
Filling Ideas for Any Occasion
This versatile centerpiece works for sweet and savory displays:
- Charcuterie board. Fill with salami, prosciutto, cheese cubes, grapes, olives, and crackers for a stunning appetizer spread .
- Dessert display. Fill with cookies, brownie bites, chocolate truffles, and fresh berries .
- Seasonal fruit. Use apples, pears, figs, pomegranate seeds, and nuts for a beautiful fall table .
- Individual servings. Make smaller cornucopias using sugar cone molds and fill with pumpkin mousse, chocolate cream, or passion fruit custard for individual desserts .
How to Store
Store the baked (unfilled) cornucopia in an airtight container at room temperature for up to 2 days. Avoid refrigerating, as this can make the pastry lose its crispiness.
Once filled, the cornucopia should be served within a few hours, as moisture from the filling can soften the pastry. If you’re using it as a centerpiece, it will hold up well throughout a meal.
Frequently Asked Questions
Can I make the cornucopia ahead of time?
Yes, you can bake it a day or two in advance and store it in an airtight container. Fill it just before serving to maintain its crisp texture .
Why did my pastry crack when I removed the foil?
This can happen if the pastry is still warm when you try to remove the foil. Let it cool completely before sliding the foil out. Wrapping the foil in non-stick foil or spraying it with cooking spray also helps with release .
Can I use crescent roll dough instead of puff pastry?
Yes, crescent roll dough can be used as a shortcut. The texture will be more bread-like and less flaky, but it will still create a beautiful cornucopia shape .
What size should the cornucopia be?
A cornucopia about 10-12 inches long works well for a centerpiece. If you’re making individual portions, use sugar cones wrapped in foil for smaller, dessert-sized horns .
Why did my cornucopia collapse in the oven?
The foil mold wasn’t sturdy enough. Use heavy-duty foil and shape it firmly. You can also place a small oven-safe bowl inside the cone to give it extra support during baking .