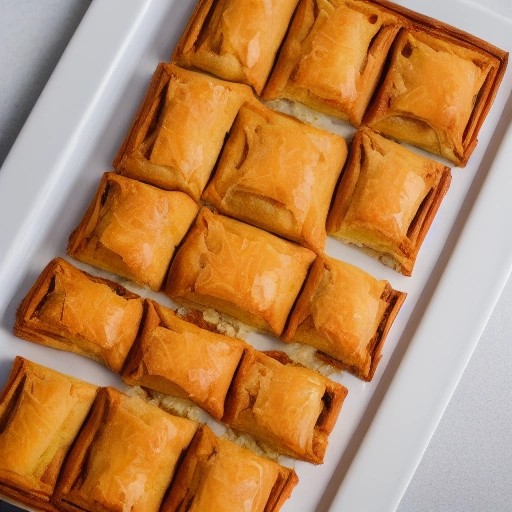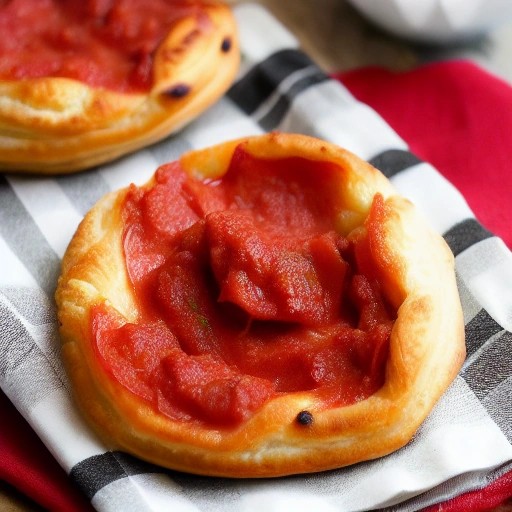

Homemade Cherry Puff Pastry Turnovers – Tart, Sweet & Irresistibly Flaky
There’s something truly special about a homemade cherry turnover. The golden, buttery pastry cracks open to reveal a luscious, jewel-toned cherry filling that’s perfectly tart and sweet. And the best news? You don’t need to be a trained pastry chef to make them. With a sheet of frozen puff pastry, fresh or frozen cherries, and a handful of pantry staples, you’ll have stunning bakery-quality turnovers in under 30 minutes.
These cherry turnovers are my go-to when I want to impress without the stress. No complicated dough making, no resting times — just simple folding and baking. They’re perfect for breakfast, dessert, or a special treat with your afternoon coffee. Let’s fill your kitchen with the scent of buttery, fruity perfection.
Because we’re using store-bought puff pastry (all-butter is worth the splurge here), the hardest part is remembering to thaw it overnight in the fridge. Once that’s done, you’re just minutes away from flaky, cherry-filled bliss.
📋 Recipe Summary
Prep Time: 15 mins
Cook Time: 18–22 mins
Total Time: 33–37 mins
Servings: 8 turnovers (4–6 servings)
Difficulty: Easy ⭐
🍒 Ingredients
- 1 sheet (about 8 oz / 230g) frozen puff pastry, thawed
- 2 cups fresh or frozen sweet cherries, pitted and chopped (or sour cherries for extra tang)
- ¼ cup granulated sugar (reduce to 3 tbsp if using sweet cherries)
- 1 tablespoon cornstarch
- 1 teaspoon fresh lemon juice
- ¼ teaspoon almond extract (optional but magical with cherry)
- 1 egg (for egg wash) + 1 tablespoon water
- Coarse sugar (turbinado or sanding sugar) for topping
- Powdered sugar for dusting (optional)
👩🍳 Step-by-Step Instructions
- Preheat & prep: Preheat your oven to 400°F (200°C). Line a baking sheet with parchment paper. Remove puff pastry from the fridge — it should be cold but pliable.
- Make cherry filling: In a medium bowl, combine chopped cherries, sugar, cornstarch, lemon juice, and almond extract (if using). Stir well. If using fresh cherries, let sit for 5–10 minutes to release their juices. For frozen cherries, add them directly from the freezer — no need to thaw.
- Roll & cut pastry: Lightly flour your work surface. Gently roll the puff pastry sheet into a 10×10-inch square (just to smooth out any creases). Cut into 4 equal squares (about 5×5 inches each) for large turnovers. This recipe makes 4 generous turnovers.
- Spoon filling: Place about 2 tablespoons of cherry filling on one half of each square, leaving a ½-inch border around the edge. Do not overfill — cherries release juice as they bake.
- Fold & seal: Brush the edges lightly with egg wash (egg + water whisked together). Fold the empty half over the filling to form a triangle. Press edges firmly with a fork to create a tight seal. Cut 2 small slits on top to vent steam.
- Egg wash & sugar: Brush the top of each turnover with remaining egg wash. Sprinkle generously with coarse sugar for that beautiful bakery-style crunch.
- Bake to golden perfection: Arrange turnovers on the prepared baking sheet (at least 1 inch apart). Bake for 18–22 minutes until puffed, deeply golden brown, and cherry juices are bubbling through the vents. Rotate the pan halfway through baking.
- Cool & dust: Let turnovers cool on the sheet for 5 minutes, then transfer to a wire rack. Dust with powdered sugar just before serving. Enjoy warm — the filling is like molten cherry pie!
✨ Baker’s Tips & Troubleshooting
- Keep pastry COLD at all times: Warm puff pastry = melted butter = no flaky layers. If the dough feels soft or sticky, chill it in the fridge for 10 minutes before continuing.
- Pit your cherries carefully: Nothing ruins a bite like a hidden pit. Use a cherry pitter or carefully cut each cherry in half and remove the pit by hand. Frozen cherries are often already pitted — check the package.
- Don’t skip the cornstarch: Cherries are naturally juicy. Cornstarch thickens the filling so you get jammy goodness instead of runny mess.
- Seal like you mean it: A loose seal = leaking cherry juice = burnt edges and sticky baking sheet. Press down firmly with a fork, then double-check all corners.
- Freeze for later: Assemble turnovers, freeze on a baking sheet for 1 hour, then transfer to a freezer bag. Bake from frozen at 375°F for 25–30 minutes (no need to thaw).
🍒 5 Delicious Variations
- 🍫 Dark Chocolate Cherry: Add 1 tablespoon of dark chocolate chips or chopped chocolate next to the cherry filling. The warm, melted chocolate with cherries is heavenly.
- 🌰 Cherry Almond: Sprinkle 1 teaspoon of sliced almonds on top of the egg wash before adding coarse sugar. Also add ½ teaspoon almond extract to the filling for double almond flavor.
- 🍋 Lemon Cherry: Add 1 tablespoon of lemon zest to the filling and replace regular sugar with vanilla sugar. Bright, fresh, and vibrant.
- 🥃 Bourbon Cherry: Add 1 teaspoon of bourbon or vanilla extract to the cherry filling. Grown-up, warm, and deeply flavorful — amazing for dessert.
- 🍒 Sour Cherry & Cardamom: Use sour cherries (increase sugar to ⅓ cup) and add ¼ teaspoon ground cardamom to the filling. Spiced, tangy, and unforgettable.
🧊 Storage & Reheating
Counter storage: Baked cherry turnovers keep well in an airtight container at room temperature for up to 2 days. The pastry will soften slightly but stays delicious.
Refrigerator: Store in the fridge for up to 5 days. To reheat, place in a 350°F oven for 5–7 minutes to bring back the crispy, flaky texture. (Avoid the microwave — it makes pastry sad and soggy.)
Freezer (unbaked): Freeze assembled, unbaked turnovers on a parchment-lined tray until solid, then transfer to a freezer bag. Bake directly from frozen at 375°F for 25–30 minutes, adding a few extra minutes if needed.
Freezer (baked): Cool completely, then freeze in a single layer. Reheat frozen baked turnovers in a 325°F oven for 8–10 minutes. They taste nearly fresh-baked!
❓ Frequently Asked Questions
1. Can I use canned cherry pie filling instead of fresh cherries?
Absolutely! Using canned cherry pie filling is the ultimate shortcut. Use about ½ cup of pie filling for 4 turnovers (2 tablespoons each). Skip the sugar, cornstarch, and lemon juice — pie filling is already sweetened and thickened. Just spoon, fold, and bake. So easy!
2. Why did my cherry filling leak out and burn on the baking sheet?
Leaking happens when turnovers aren’t sealed properly or when they’re overfilled. Use only 2 tablespoons of filling per turnover, leave a clean border, and press the fork down firmly along all edges. Also, those vent slits on top are essential — they let steam escape so your turnovers don’t burst open.
3. Can I use frozen cherries without thawing them first?
Yes, and actually that works great! Add frozen cherries directly to the bowl (still frozen). Because frozen cherries release more liquid, add an extra ½ teaspoon of cornstarch to compensate. Your turnovers will still come out perfect.
4. How do I know when the turnovers are fully baked?
Look for three signs: the pastry should be deep golden brown (not pale), the turnovers should look puffed and layered, and you should see cherry filling bubbling through the top slits. If the bottoms are still pale, bake for 2–3 more minutes.
5. Can I make these turnovers with sour cherries?
Yes, and they’re incredible! Sour cherries (also called tart cherries) have a brighter, tangier flavor. Increase the sugar to ⅓ cup to balance the tartness. Sour cherry turnovers taste like old-fashioned homemade pie — absolutely worth seeking out.
6. Why does my puff pastry sometimes turn out tough instead of flaky?
Tough pastry usually means the dough got too warm and the butter melted into the flour before baking. Always start with cold pastry, work quickly, and if the dough feels soft at any point, chill it in the fridge for 10 minutes. Cold butter = steam = flaky layers.
Homemade cherry puff pastry turnovers are proof that simple ingredients create something spectacular. With their shatteringly flaky crust, jewel-toned cherry filling, and sparkling sugar crust, they taste like they came from an artisan bakery — but you made them in your own kitchen. Try this cherry puff pastry recipe once, and you’ll be making it for every special occasion. Happy baking!
📌 Love this recipe? Save it for later or share it with someone who deserves a homemade cherry treat.