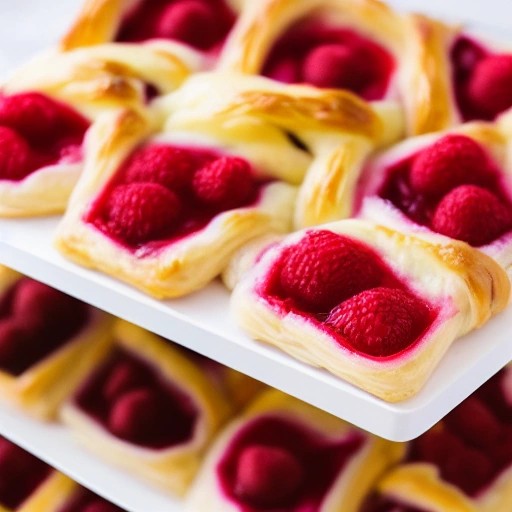
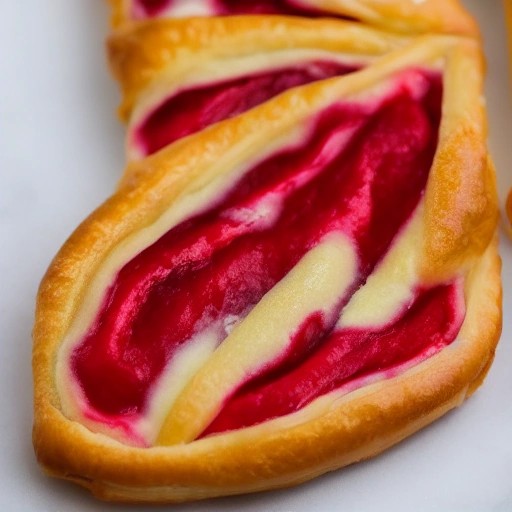
Cherry Cheese Danish – Creamy, Tart & Bakery-Style Easy
There’s something absolutely irresistible about a cherry cheese Danish. The flaky, golden pastry gives way to a creamy, velvety cheesecake filling, topped with sweet-tart cherry pie filling that makes every bite pure bliss. And here’s the best news — you don’t need to be a professional pastry chef to make these stunning pastries. With a sheet of frozen puff pastry, a simple cream cheese filling, and canned cherry pie filling, you’ll have impressive bakery-style Danishes in under 30 minutes.
These cherry cheese Danishes are my go-to for holiday brunches, baby showers, or any time I want to serve something that looks fancy but is secretly so easy. No yeast, no proofing, no complicated dough — just puff pastry, cream cheese, cherries, and that dreamy drizzle. Let’s make your kitchen smell like a French patisserie.
Since we’re using store-bought puff pastry (all-butter if you can find it) and canned cherry pie filling, the hardest part is remembering to thaw the pastry overnight. Once that’s done, you’re just minutes away from cherry cheese Danish perfection.
📋 Recipe Summary
Prep Time: 12 mins
Cook Time: 18–22 mins
Total Time: 30–34 mins
Servings: 8 Danishes (4–8 servings)
Difficulty: Easy ⭐
🍒 Ingredients
For the Cherry Cheese Danish:
- 1 sheet (about 8 oz / 230g) frozen puff pastry, thawed
- 1 can (21 oz) cherry pie filling (or about 1 ½ cups)
- 8 oz cream cheese, softened to room temperature
- ¼ cup granulated sugar
- 1 large egg yolk (reserve the white for egg wash or use a whole egg)
- ½ teaspoon vanilla extract
- ¼ teaspoon almond extract (optional, but amazing with cherry)
- 1 tablespoon all-purpose flour (helps thicken the cheese filling)
- 1 egg (for egg wash) + 1 tablespoon water
- 2 tablespoons sliced almonds (optional, for topping)
For the Glaze (optional but recommended):
- ½ cup powdered sugar (confectioners’ sugar)
- 1–2 tablespoons milk or heavy cream
- ¼ teaspoon vanilla extract
- 1 tablespoon reserved cherry pie filling juice (optional, for color and flavor)
👩🍳 Step-by-Step Instructions
- Preheat & prep: Preheat your oven to 400°F (200°C). Line a baking sheet with parchment paper. Remove puff pastry from the fridge — it should be cold but pliable.
- Make the cream cheese filling: In a medium bowl, beat together softened cream cheese and granulated sugar until smooth and creamy (no lumps!). Add the egg yolk, vanilla extract, almond extract (if using), and flour. Beat again until well combined and silky. Set aside.
- Prepare the puff pastry: Lightly flour your work surface. Gently roll the puff pastry sheet into a 10×10-inch square (just to smooth out any creases). Cut into 4 equal squares (about 5×5 inches each) for large Danishes, or 8 smaller rectangles for bite-sized pastries. This recipe makes 4 large Danishes.
- Shape the Danishes: For each square, use a sharp knife to score a smaller inner square (about ½ inch from the edges). Do not cut all the way through — just score the dough. Prick the inner square all over with a fork (this prevents the center from puffing up too much, creating a perfect well for your fillings).
- Add the cream cheese filling: Spoon about 1½ tablespoons of the cream cheese mixture into the center of each scored square, spreading it gently inside the border but not over the edges.
- Add the cherry filling: Top the cream cheese with 3–4 cherries from the pie filling (about 1 tablespoon). Try to leave behind some of the thick syrup — too much liquid can make the pastry soggy. Save any extra syrup for the glaze.
- Egg wash: Brush the outer border (the raised edge) with egg wash (egg + water whisked together). Be careful not to drip egg wash onto the fillings.
- Add optional toppings: Sprinkle sliced almonds over the egg wash if using.
- Bake to golden perfection: Arrange Danishes on the prepared baking sheet (at least 1 inch apart). Bake for 18–22 minutes until puffed, deeply golden brown, and the cream cheese filling is set. Rotate the pan halfway through baking.
- Make the glaze: While Danishes are baking, whisk together powdered sugar, milk, vanilla extract, and a splash of reserved cherry syrup (if using) until smooth. The glaze should be thick but pourable — add more milk or powdered sugar to adjust consistency.
- Glaze & serve: Let Danishes cool on the sheet for 5 minutes, then transfer to a wire rack. Drizzle or spoon the glaze generously over the warm Danishes. Serve warm or at room temperature. Enjoy the creamy, cherry-filled perfection!
✨ Baker’s Tips & Troubleshooting
- Use full-fat cream cheese: Low-fat or non-fat cream cheese contains more water, which can make the filling runny and prevent it from setting properly. Full-fat cream cheese gives you that rich, creamy, cheesecake-like texture.
- Soften cream cheese properly: Take the cream cheese out of the fridge 30–60 minutes before baking. Room temperature cream cheese blends smoothly without lumps. In a pinch, microwave it for 10–15 seconds — but don’t melt it!
- Keep pastry COLD: If your puff pastry gets warm or sticky while you’re working, stop and chill it in the fridge for 10 minutes. Cold butter = flaky layers.
- Don’t overfill: Too much cherry filling = leaks = burnt edges and messy baking sheet. A few cherries (about 3–4) per Danish is plenty. Save extra cherry filling for another batch or to serve on the side.
- Drain the cherries slightly: Canned cherry pie filling can be very syrupy. Use a fork to lift the cherries out of the can, letting excess syrup drip back in. Too much liquid makes the pastry soggy underneath.
- Make ahead: Assemble Danishes (without glaze), freeze on a baking sheet for 1 hour, then transfer to a freezer bag. Bake from frozen at 375°F for 22–26 minutes. Glaze after baking.
🍒 5 Delicious Variations
- 🍫 Chocolate Cherry Cheese Danish: Add 1 tablespoon of mini chocolate chips on top of the cream cheese filling before adding the cherries. The melted chocolate and cherries are heavenly together.
- 🍋 Lemon Cherry Danish: Add 1 teaspoon of lemon zest to the cream cheese filling. The bright citrus cuts through the richness beautifully and complements the cherries.
- 🫐 Blueberry Cheese Danish: Swap the cherry pie filling for blueberry pie filling. The blueberries pair perfectly with the creamy cheesecake filling.
- 🍓 Strawberry Cheese Danish: Use strawberry pie filling or fresh sliced strawberries tossed in a little sugar and cornstarch. So pretty and delicious.
- 🥜 Cherry Almond Danish: Double the almond extract in the cream cheese filling and sprinkle sliced almonds generously over the top before baking. The almond-cherry combination is a classic for a reason.
🧊 Storage & Reheating
Counter storage: Baked cherry cheese Danishes keep well in an airtight container at room temperature for up to 1 day. Because of the cream cheese filling, they’re best stored in the refrigerator for longer than a day.
Refrigerator: Store in the fridge for up to 4 days in an airtight container. To reheat, place in a 325°F oven for 5–7 minutes to restore crispiness. (Avoid the microwave — it makes puff pastry chewy and sad.)
Freezer (unbaked): Freeze assembled, unbaked Danishes (without glaze) on a parchment-lined tray until solid, then transfer to a freezer bag. Bake directly from frozen at 375°F for 22–26 minutes. Add glaze after baking.
Freezer (baked, unglazed): Cool completely, then freeze without glaze in a single layer. When ready to serve, reheat in a 325°F oven for 8–10 minutes, then add fresh glaze.
❓ Frequently Asked Questions
1. Can I use fresh cherries instead of canned cherry pie filling?
Absolutely! Fresh cherries make a wonderful filling. Pit and chop about 1½ cups of fresh sweet cherries. In a saucepan, combine cherries with ⅓ cup sugar, 1 tablespoon cornstarch, 1 tablespoon lemon juice, and ¼ cup water. Cook over medium heat for 5–7 minutes until thickened and bubbly. Let cool completely before using. Homemade cherry filling tastes incredible!
2. Why did my cream cheese filling leak out during baking?
Leaking usually happens from overfilling or not scoring the pastry properly. Make sure you’ve scored a border (not cut through) and pricked the center with a fork — this creates a dam that holds the filling in place. Also, don’t spread the cream cheese all the way to the scored edge; leave a tiny gap. Using too much filling (more than 1½ tablespoons per Danish) can also cause leaks.
3. Can I make these cherry cheese Danishes with puff pastry that’s already thawed?
Yes, but keep it cold! Once puff pastry thaws, it’s best to use it within 24 hours. If it sits at room temperature for too long, the butter melts into the dough and it won’t puff properly. If your thawed pastry feels warm or sticky, pop it in the fridge for 10–15 minutes before working with it.
4. Can I use a different type of pastry instead of puff pastry?
Yes! You can use crescent roll dough (from a tube) for a softer, bread-like Danish. You can also use phyllo dough (multiple layers brushed with butter) for an extra-crispy version, or even refrigerated biscuit dough pressed flat. Each will give a different texture, but all are delicious. Puff pastry gives the most classic flaky Danish texture.
5. How do I know when the cream cheese filling is fully cooked?
The cream cheese filling is done when it’s puffed slightly, looks set (not jiggly), and feels firm to a gentle touch. The edges of the filling may be lightly golden. If the filling still looks wet or jiggly when you take the Danishes out, return them to the oven for 2–3 more minutes. Overbaking can cause the filling to crack, but it will still taste great.
6. Can I make these gluten-free?
Yes! Look for a good quality gluten-free puff pastry (several brands now offer it). The cream cheese filling and cherry pie filling are naturally gluten-free, but double-check your pie filling label — some brands use wheat-based thickeners. You can also make your own cherry filling with cornstarch (gluten-free) to be safe. For the glaze, simply use gluten-free powdered sugar.
7. My Danishes didn’t puff up evenly — what happened?
Uneven puffing usually happens when the pastry wasn’t rolled evenly, or when the egg wash dripped down the sides and glued the pastry to the baking sheet. Make sure your puff pastry is an even thickness before cutting. When brushing egg wash, only brush the top border — avoid letting it drip down the sides onto the parchment paper. Also, make sure your oven is fully preheated before the Danishes go in.
Cherry cheese Danish recipe proves that you can create stunning, bakery-quality pastries right in your own kitchen with hardly any effort. With their shatteringly flaky crust, creamy cheesecake filling, and sweet-tart cherry topping, these Danishes will disappear faster than you can make them. Try this cherry cheese Danish once, and it’ll become your go-to for holiday brunches, potlucks, and any time you need a showstopping treat that’s secretly so easy. Happy baking!
📌 Love this recipe? Save it for later or share it with someone who deserves a creamy, cherry-filled treat.